A quick recap of
the main topic: My employer,
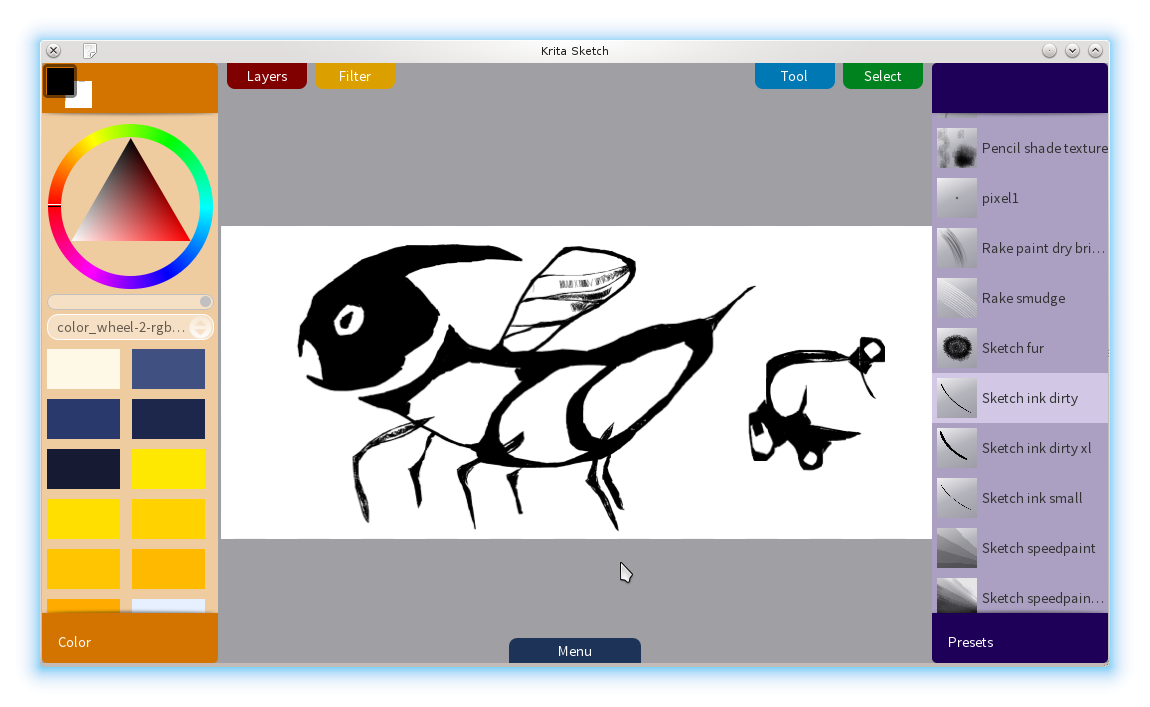
KO GmbH, has been working on a touch version of
Krita, called Krita Sketch, over the last few months, and is gearing up towards a first release. So, i'm doing a bit of writing, talking about some of the work i've been doing as a part of this project.
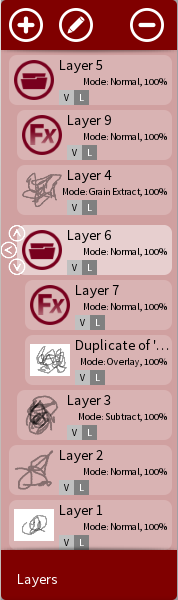
One of the most vital features of Krita is its powerful layer system. Powered by the Calligra Flake library, which forms the base of the document structure in the majority of Calligra's applications, it allows the user to nest and group layers in all sorts of interesting ways, and while this is all fun and games in a desktop application, where tree structures are shown as, well, trees, in a touch based application where the concept of trees has been all but banished and the only available data structure for multiple-item data is a list, well, something had to be worked out for this. This blog entry, then, is all about the odd beast that is a flattened tree structure with retained structural information. In other words, how do you fake a tree when you only have a list?
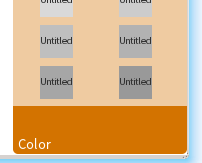
On the left of this text you can see the current version of our tree-list, and below what this looks like on the desktop. You might also notice some interesting details such as the change in where certain controls are (specifically the movement controls). In QML this sort of thing, that is, putting controls on top of something else, spreading outside of the perceived borders of an item, is very easy to do.

Some of you working on the desktop will be aware of how you sometimes fake a listview using Qt's powerful QTreeView widget. Well, in QML you haven't got a tree view. What you have instead is an incredibly powerful ListView component.
As such things go, what we ended up doing to the model was to cheat. When building this type of structure you really have two options: Either you do it the "proper" way and do the conversion on the fly, or you store a flattened version of the data structure. They both have advantages and disadvantages: Option 1 will give you the least amount of data duplication, but it will be programmatically expensive at times. Option 2 will cause some amount of data duplication, but reading each item will be cheaper at all times. As we have a data structure here with what will always be a computer-sciencey version of a small number (unlikely to have hundreds of layers in an image), and the fact that reading the data rapidly is more important than saving the few hundred bytes of memory that storing a list of pointers would cause, we decided that doing it this way would be most sensible of the two.
So, with that in mind, we can start to discuss what's needed to take a tree and flatten it into a list model usable from QML, while retaining some of the information.
A list of general things to remember when building a model for use with QML is below. I will be going into each of these in larger detail below, but as a convenient check list, here you go:
- Inherit QAbstractListModel. This allows for the highest degree of control, and at the same time gives you a large number of safety checks for free. Don't use a QAbstractItemModel unless you really, really have to (and i'd like to know when that becomes a need, i've yet to find one ;) ).
- Role names. Make sure you use role names when building your data reimplementation. This allows you register names for use on the QML side, and pair them with a field name on the C++ side. Specifically you will need to use setRoleNames() in your constructor. Create an enum inside your class, with the value of the first entry set to Qt::UserRole + 1, and set the equivalent names for each of these using a QHash in your constructor.
- Reimplement data() using the role names you created above, by setting up a switch statement over the role argument, using your roles as the only entries. (note that the standard entries in Qt are still good to have, if you are sharing the model with a QWidget based application as well). Note, you must remember to check validity of your QModelIndex before you try using it (see below).
- Reimplement rowCount() as simply as you can. In our case, as we have a QList of entries, check whether the parent is a valid QModelIndex. If the parent is valid, you're a list and any real entry has no children. If the parent is not valid, it is the virtual root of the data structure, which as its children has all the entries in the list, and as such you in that case return the number of entries.
However, in addition to this, we also have a couple of other items to worry about. In our case, our model is acting essentially as a facade to another model, which comes with a set of specific oddities which are not quite modelley, but more like view information. In particular, we need to convey information about which is the currently active layer, and further need an ability to request to change to a different layer. To do this, we have two things going on: One private slot which listens to the node activation and update requests from the KisNodeManager instance of the view of the canvas for the current image, which keeps track of all this information, and a role which tells us which is the current layer. The dataChanged function is then called on both the indices corresponding to the previously active layer and the new active layer, and the view acts accordingly, updating the data for only those two items.
QAbstractListModel vs QAbstractItemModel
In some ways the choice here is really straight forward: In QML you only have lists available, you have no views which will handle a tree structure. However, if you have built models yourself in the past, you may have found yourself limited by the list model, and just defaulted to using the abstract one. Stay your code finger and really think before you do this again. QAbstractListModel has all the power you need when dealing with QML, where any item in a list is really just a pseudo-object with properties, so you don't need the columns or anything like that (in fact, you could want to map your columns to a name to access it from QML, and that translates pretty directly to using the roleNames functionality). Short, but i hope that's clear enough without me grinding on about it ;)
Role Names
Rather than using columns or any such thing, in QML you access the fields in your model by using names. What this means is that you need to register the names you want to be able to use using the setRoleNames() call in your model's constructor. A very short example would work as follows, where you have two roles (a name and a subtitle, just as examples)
YourModel.h:
class YourModel : public QAbstractListModel
{
Q_OBJECT
public:
enum LayerRoles {
NameRole = Qt::UserRole + 1,
SubtitleRole
}
YourModel(QObject* parent = 0);
~YourModel();
private:
class Private;
Private* d;
};
YourModel.cpp:
YourModel::Private {
Public:
Private() {};
QList<YourItem> list;
};
LayerModel::LayerModel(QObject* parent)
: QAbstractListModel(parent)
, d(new Private)
{
QHash<int, QByteArray> roles;
roles[NameRole] = "name";
roles[SubtitleNameRole] = "subtitle";
setRoleNames(roles);
}
QVariant LayerModel::data(const QModelIndex& index, int role) const
{
QVariant data;
if (index.isValid())
{
switch(role)
{
case IconRole:
data = d->list[index.row()].name();
break;
case NameRole:
data = d->list[index.row()].subtitle();
break;
default:
break;
}
}
return data;
}
int YourModel::rowCount(const QModelIndex& parent) const
{
if ( parent.isValid() )
return 0;
return d->items.count();
}
What you see above is all that's needed to be able to call model.name and model.subtitle in your ListView item's delegate inside QML. This particular part is documented well in the
ListView documentation, but the C++ side is lacking just a little. Note that you still, of course, need to somehow expose the C++ class to QML somehow. There's two ways of doing this. Either you return an instance from some class registered elsewhere, in which case you don't need to do anything special (since it's a QObject type), or you allow for the creation of instances of the model inside QML. To do this, all you need to do is, somewhere in your code (likely your main function):
qmlRegisterType<YourModel>("your.application", 1, 0, "YourModel");
The your.application part is what you then import in your QML file, 1 and 0 is the version numbers (so you would do import your.application 1.0) and YourModel is the name of the component you can instantiate (just as you would any other QML component).
Flattening
The final part of this entry is about what we did about the tree of layers. So, having shown the most basic structure above, here is the function which creates the list of layers when a layer is added or removed (and of course on start-up). Yes, i am aware that we could splice new layers in and such, but quite frankly, this is so fast that you in reality don't notice it. If it becomes a performance problem, then we can fix it, but for now, the act of actually creating a layer or removing it (in other words, repainting the image) vastly outweighs the price of this function.
void rebuildLayerList(KisNodeSP layer = 0)
{
if(layer == 0)
{
layers.clear();
layer = image->rootLayer();
}
// implementation note: The root node is not a visible node, and so
// is never added to the list of layers
QList<KisNodeSP> children = layer->childNodes(layerClassNames(), KoProperties());
if(children.count() == 0)
return;
for(quint32 i = children.count(); i > 0; --i)
{
layers << children.at(i-1);
rebuildLayerList(children.at(i-1));
}
}
The logic is very simple here: If no layer is passed, we clear out the list and start working on the root. From there, we go through all children as appropriate (the layerClassNames function simply returns a list of the names of the layer types we're interested in), and then cycle through them all, adding each children, and its children, to the list. You will recognise this as a depth first search, and if you don't, that's what it's called when you go through a tree structure and list all children as soon as you find a new child to list (rather than a breath first search, where you list all children at one layer before going down one layer).
This means that when we ask the model at which depth some item can be found, all we have to do is traverse all the way up through the tree until we reach the root node (that is, until we reach a layer which has no parent node). That particular bit of code, found in the data() function (indicated above) is extremely simple, but just so you don't have to go digging, here's the relevant part of said function:
KisNodeSP parent
KisNodeSP node = d->layers[index.row()];
int depth = -1;
switch(role)
{
case DepthRole:
parent = node;
while(parent)
{
++depth;
parent = parent->parent();
}
data = depth;
break;
...
And that's really all there is to it. Just remember to call rebuildLayerList() every time the tree model you are watching changes. In our case, that means we have this in the constructor, but of course it would depend on when you get the tree model.
connect(d->nodeModel, SIGNAL(rowsAboutToBeInserted(QModelIndex, int, int)),
this, SLOT(source_rowsAboutToBeInserted(QModelIndex, int, int)));
connect(d->nodeModel, SIGNAL(rowsInserted(QModelIndex, int, int)),
this, SLOT(source_rowsInserted(QModelIndex, int, int)));
connect(d->nodeModel, SIGNAL(rowsAboutToBeRemoved(QModelIndex, int, int)),
this, SLOT(source_rowsAboutToBeRemoved(QModelIndex, int, int)));
connect(d->nodeModel, SIGNAL(rowsRemoved(QModelIndex, int, int)),
this, SLOT(source_rowsRemoved(QModelIndex, int, int)));
connect(d->nodeModel, SIGNAL(dataChanged(QModelIndex,QModelIndex)),
this, SLOT(source_dataChanged(QModelIndex,QModelIndex)));
connect(d->nodeModel, SIGNAL(modelReset()),
this, SLOT(source_modelReset()));
I hope this has been of some use to someone out there, and i will see you soon in the next instalment of Krita Sketch Is! ;)
The word of the day is: Flattened
Labels: kde, krita, qt

 height: 50;